

OEM Engine Cylinder Head: A Complete Guide to Choosing and Replacing
2026-09-10
When an engine cylinder head fails, the choice between a cheap aftermarket part and a reliable OEM replacement can make or break your engine’s future. This guide cuts through the noise, walking you through exactly what to look for when choosing an OEM cylinder head and how to replace it without costly mistakes. Along the way, you’ll see why DDR has become a trusted name for builders and mechanics who refuse to gamble on quality. Whether you’re dealing with a cracked casting, warped deck, or simply overdue maintenance, the decisions ahead are more straightforward than the forums make them seem.
When a Cracked Cylinder Head Is Actually Repairable
A cracked cylinder head doesn't automatically mean you're shopping for a replacement. The deciding factor usually comes down to where the crack sits and whether it has reached a pressurized oil or coolant passage. Hairline fractures along non-structural webbing or between head bolt bosses can often be stitched, pinned, or welded without compromising the casting. The moment the crack extends into a valve seat, a cylinder bore sealing surface, or the deck face where head gasket fire rings need to clamp, repair becomes far less predictable.
Small cracks that stay out of the combustion chamber and don't open up under torque are the best candidates. A machine shop can pressure-test the head, then drill and tap along the crack to install tapered pins or use a furnace-welding process for cast iron. Aluminum heads respond well to TIG welding followed by resurfacing, as long as the damage hasn't distorted the cam bore or lifter bores. If the crack is in an area that sees only low stress and can be fully prepped, the repair can outlast the rest of the engine.
What kills most repair attempts isn't the crack itself—it's waiting too long. A head that has been overheated repeatedly may have micro-cracks spread across the combustion chambers or softened areas that won't hold a thread. Once the metal has lost its temper or the crack reaches a water jacket near an exhaust port, even a skilled welder will struggle to guarantee the job. The realistic window is narrow: one clean, localised crack, caught before the engine has cooked itself, is repairable. Anything more and the money is better spent on a tested used or remanufactured head.
The Hidden Flaws in Cheap Aftermarket Castings
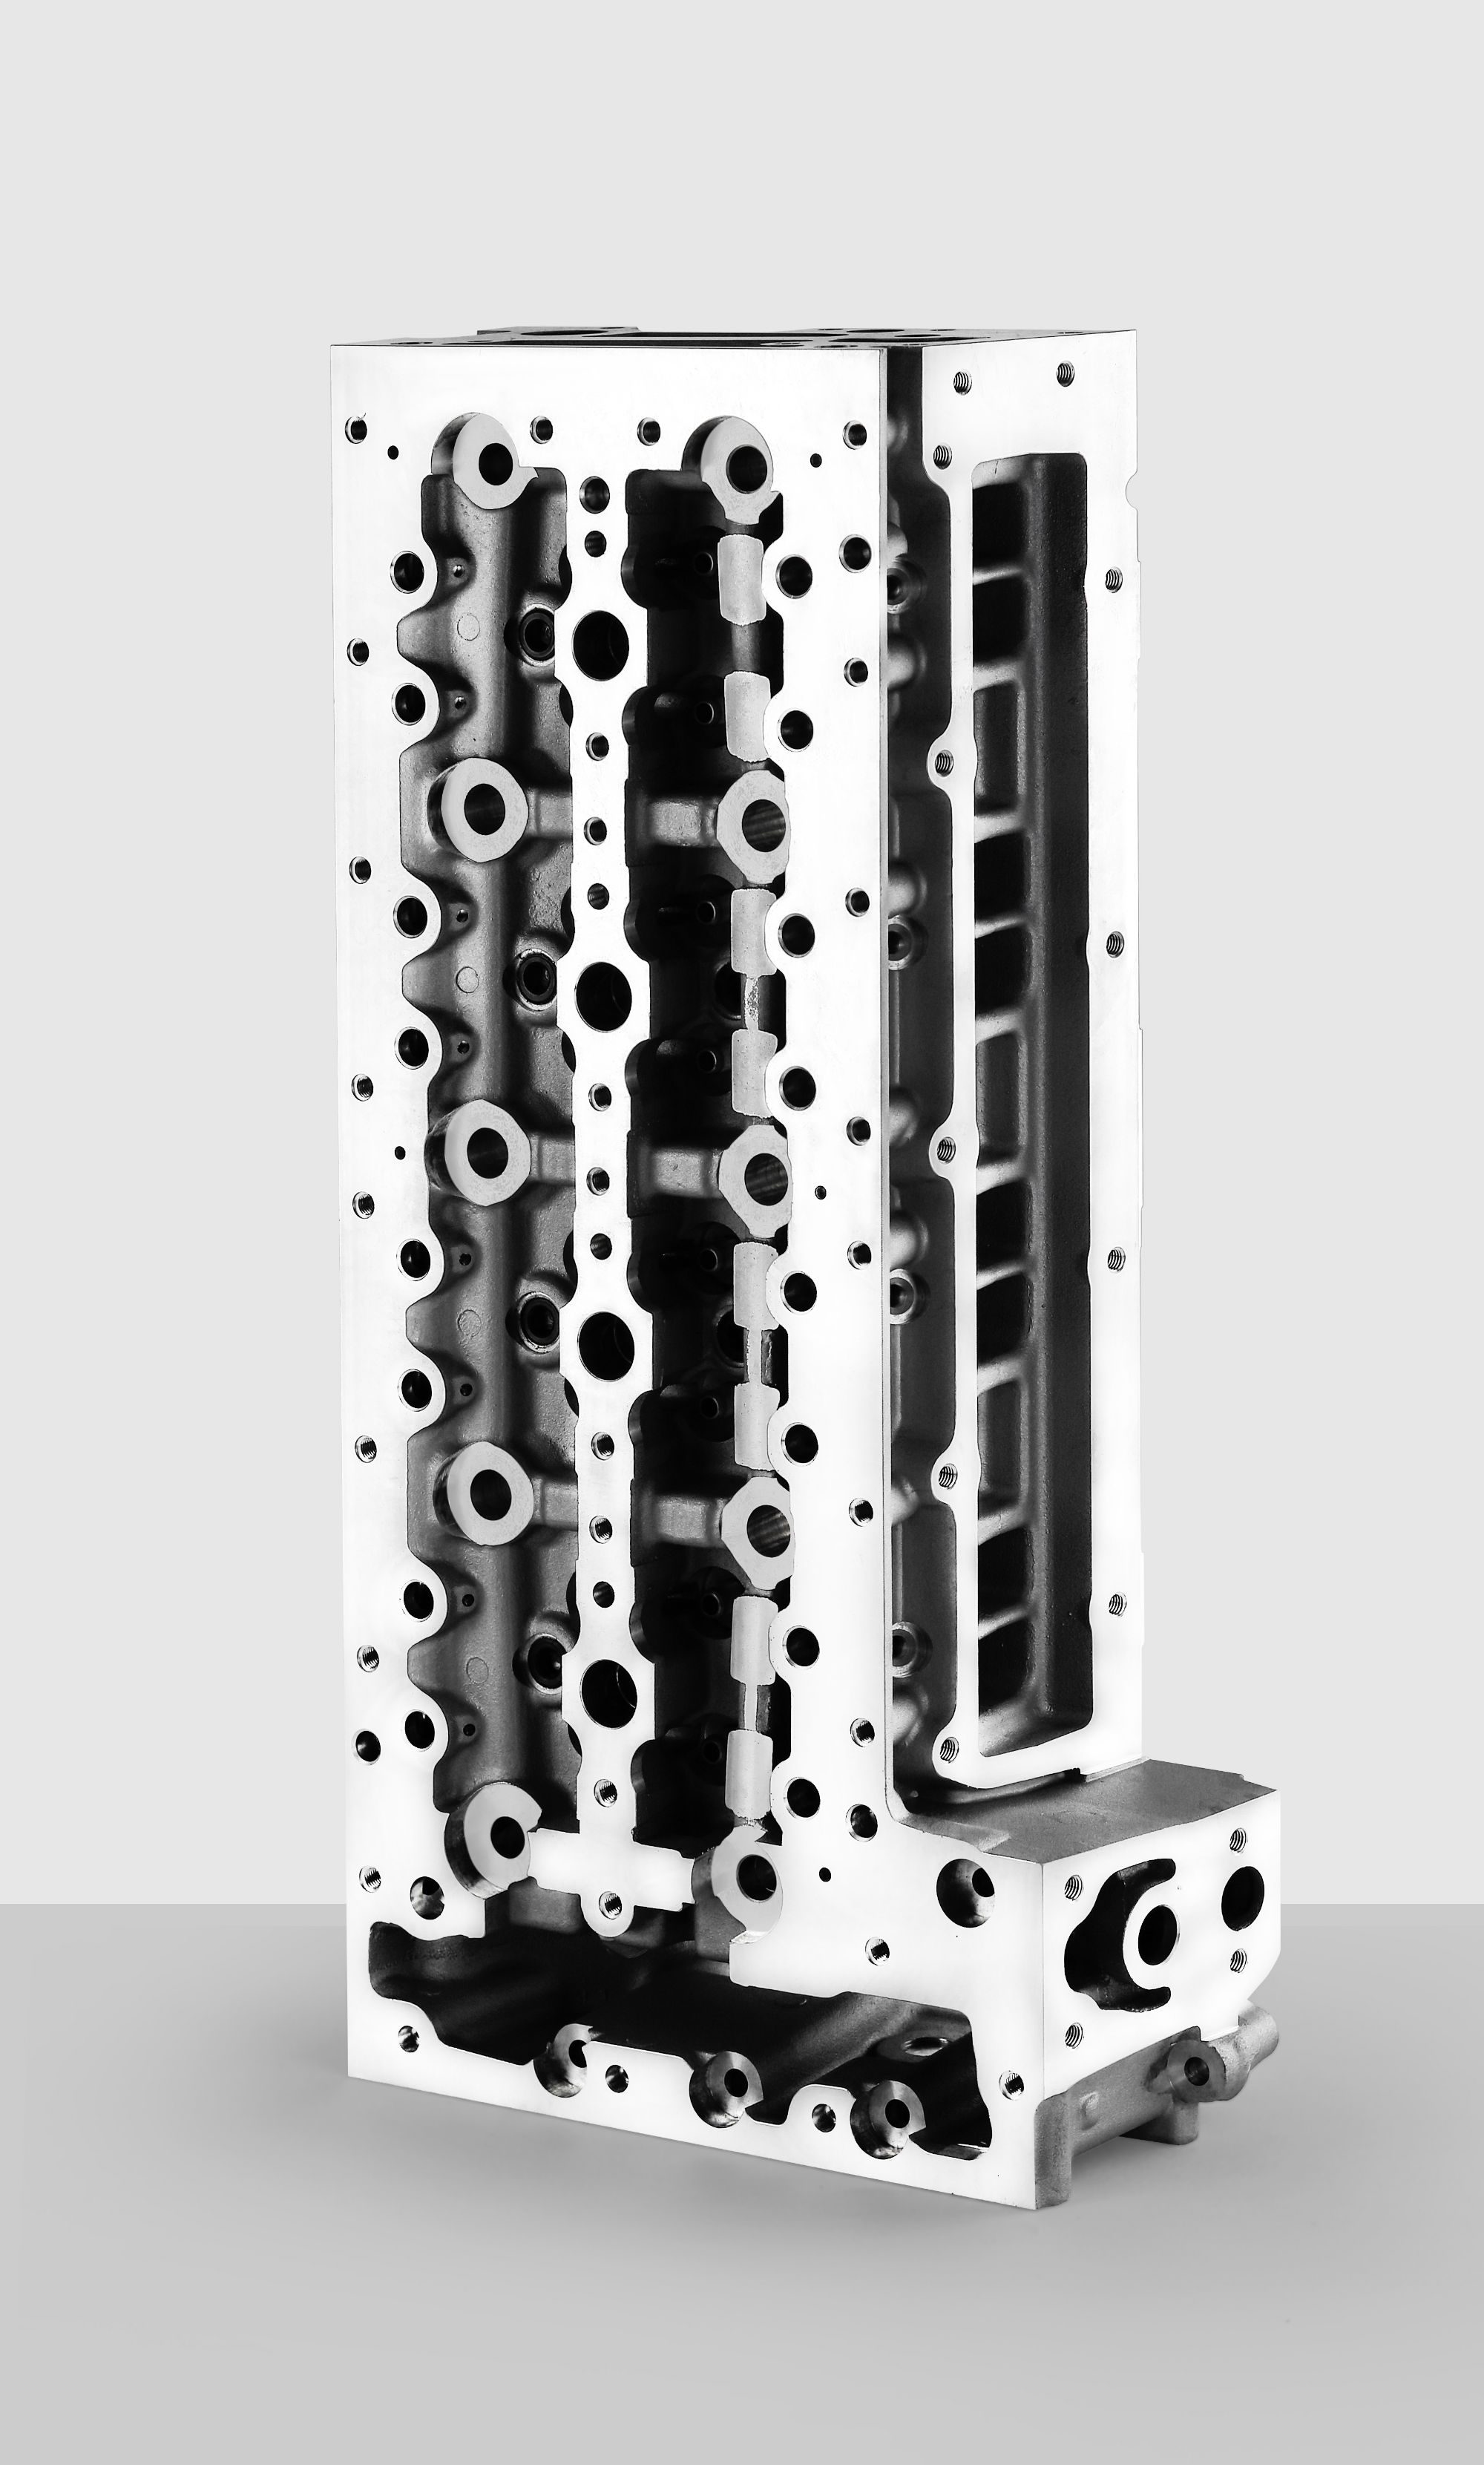
At first glance, a low-cost aftermarket casting looks identical to the factory part it replaces. The mounting holes line up, the exterior finish is smooth enough, and the price makes it hard to resist. But spend a few hours under the hood or behind the wheels, and the differences start to show. Cheap castings often suffer from inconsistent wall thickness, especially in areas hidden from direct view. This leads to uneven heat distribution, premature stress fractures, and, in some cases, catastrophic failure without warning.
The real trouble lies beneath the surface. Low-grade recycled aluminum or poorly controlled iron pours leave behind microscopic porosity, slag inclusions, and micro-cracks that quickly propagate with vibration and thermal cycling. Many of these flaws are invisible to the naked eye and pass right through lax quality control. Threaded bosses strip under normal torque, gasket surfaces warp after a few heat cycles, and structural ribs snap where the OEM part was designed to flex. What starts as a budget-minded repair often turns into a second, more expensive repair—plus the labor to get back there.
You might not notice the flaw until you're on the side of the road. A cracked alternator bracket, a sheared motor mount, a warped brake caliper carrier—these aren't cosmetic defects. They affect safety and reliability. The hidden cost isn't in the casting itself; it's in the tow truck, the missed work, and the parts that get damaged when the casting lets go. When a casting fails, it rarely fails alone.
Decoding Casting Numbers Without a Dealer's Help
Casting numbers hide in plain sight on your engine block, transmission case, or differential housing, and learning to read them is less about memorizing charts than understanding how manufacturers used them. Grab a wire brush, a flashlight, and some chalk or paint marker. Scrape away the grease and rust where the number is stamped or raised, then rub chalk over the surface—it settles into the recesses and makes digits pop. Write down every character, including letters, slashes, and dots, because a single missing prefix can send you down the wrong path.
Once the sequence is clean, break it into chunks. Most casting numbers follow a rough pattern: a casting date, a part identifier, and sometimes a mold or revision code. For example, a big-block Chevrolet block might carry a seven-digit number where the first digit signals the decade and the second indicates the year; a 3970010 is famous among small-block builders. Ford and Chrysler used their own logic, often embedding displacement or plant codes. Instead of calling a dealer, search old factory parts catalogs, engineer's guides, or enthusiast forums—veterans have scanned decades of microfiche and often post decoder tables that handle the oddball prefixes dealers no longer recognize.
If a number refuses to resolve, compare it against known samples from the same model year rather than relying on generic lists. Rust, casting flash, and repainting frequently change a 3 into an 8 or hide a letter entirely. A dental pick can clear shallow stampings without damaging the surface, and a low-angle light from the side will reveal ghost digits that straight-on light misses. Keep a notebook of numbers from your specific make and engine family; patterns become obvious after a few weekends, and you'll start spotting date codes and plant letters at a glance—no dealer phone call required.
A Realistic Timeline for Swapping a Head at Home
The first sixty minutes have almost nothing to do with a scalpel. You're not prepping a patient; you're realizing your living room can't become an operating theater just because you put down a tarp. Even if you've somehow obtained two bodies of roughly the same neck circumference, a bone saw, and enough sterile drapes to wrap a sofa, you still need at least four people who won't pass out at the first squirt of arterial blood. And that's before you remember you have no way to keep the severed head alive while you fumble with tubing that cost less than a video game.
Hours two through six turn into a grim juggling act. You'd need to drop the head's temperature to around ten degrees Celsius just to slow brain death, which means converting a chest freezer into a hypothermia unit while also trying to clamp the carotids without crushing them. Home sterilization via pressure cooker sounds clever until you realize the spinal cord doesn't come apart like a pair of wired earbuds. There are dozens of nerve roots, each with a different job, and none of them reattach because you dabbed on some surgical glue.
By hour six, the realistic outcome isn't a person sitting up and asking for a sandwich. It's a swollen, unresponsive head connected to a body with no working diaphragm, no immune tolerance, and a rapidly failing heart. The timeline ends not with triumph but with a 911 call somewhere around hour three—assuming you haven't already been arrested for what looks like the world's worst DIY project. A truly realistic timeline for swapping a head at home is measured in minutes of panic, not hours of progress.
Torque Sequences and Why They Make or Break a Rebuild
Most backyard builders learn the hard way that a torque wrench only tells half the story. The order you tighten fasteners dictates how the clamping load spreads across a cylinder head, oil pan, or main cap. Go around in a circle and you will pinch one side, lift the other, and leave a gasket with uneven crush. Factory manuals use a star or spiral pattern for a reason: it lets the part settle flat instead of bowing under one corner's load. Skip that sequence on a head gasket install and the failure rarely shows up at idle. It waits for a heat cycle, a hard pull, or a cold morning before coolant finds the weak spot.
Torque-to-yield head bolts make sequencing even more unforgiving. Once you stretch them past their elastic range, the first pass is only the beginning. Each subsequent angle step has to follow the exact order, or the block face and head walk slightly out of alignment. The same applies to main caps and cam caps. Bearing clearances measured on a loosened or unevenly pulled cap mean nothing when the crank spins under load. A rebuild that ignores torque sequence may run fine on the stand, but it is borrowing time from every gasket, bearing, and sealing surface under that fastener.
Break-In Habits That Prevent Warpage Down the Road
Many warpage issues trace back to how a board is ridden during its first few sessions. Instead of immediately pushing hard through carves and heavy landings, spend the first couple of hours on mellow terrain, letting the flex pattern settle evenly. This slow introduction allows the core materials to adapt without concentrating stress in one area, which is often where subtle bends begin.
Varying your stance and turn shape early on also matters more than most riders realize. If you repeatedly load the same edge or land with the same foot forward, the board develops a memory of that pressure. Shifting your weight distribution and mixing up riding styles during break-in prevents one-sided fatigue that can lead to a permanent twist.
Finally, avoid leaving the board strapped to a roof rack or leaning against a hot wall right after those first rides. Heat and uneven support during the initial cooling cycles can lock in micro-deformations. Store it flat or upright in a temperature-stable spot until the materials have fully cured from those break-in sessions.
FAQ
OEM stands for Original Equipment Manufacturer, meaning the head is produced by the same company that supplied the factory engine or built to the exact same specifications. The difference matters because cylinder heads have complex coolant passages, precise valve seat angles, and specific alloy compositions. Aftermarket castings often cut corners on material hardness or port geometry, which can lead to cracking, poor heat dissipation, or airflow inconsistencies. For a component that handles combustion pressure and temperature swings, sticking with an OEM unit avoids those compatibility headaches.
Start with a straightedge and feeler gauge across the deck surface. If warpage exceeds the manufacturer's limit—often around 0.002 to 0.004 inch depending on the engine—you're looking at replacement. Cracks between valve seats or into coolant jackets are almost always fatal because welding cast aluminum is unreliable under thermal cycling. Also check for eroded cam bearing journals and recessed valve seats. A machine shop can pressure test and magnaflux for hidden cracks, but if the head has been overheated badly enough to anneal the aluminum, no resurfacing will save it.
Don't rely on year, make, and model alone. Grab the engine code from the block or the calibration sticker under the hood, and match the head casting number if you can. Some engines have different heads for turbo versus naturally aspirated versions, or changes mid-year. Decide whether you want a bare head, a loaded head with valves and springs installed, or a complete assembly with camshafts. If you're buying a bare head, you'll need to transfer or buy new valves, keepers, and seals, which adds to the final bill.
I wouldn't call it basic, but it's doable if you're methodical. You'll need a torque wrench, angle gauge for torque-to-yield bolts, cam locking tools, and a factory service manual with the exact sequence and specs. The danger points are timing chain or belt alignment, head gasket orientation, and cleaning the block deck without gouging it. If you skip the timing lock or reuse stretch bolts, you can destroy the engine within minutes. If you've done a timing belt job and a valve cover gasket confidently, you can handle a head swap with the right prep.
The top mistake is not chasing the head bolt holes in the block. Old oil and debris in blind holes can hydrolock and crack the block when you torque the bolts. Reusing torque-to-yield head bolts is another one—they stretch permanently and won't clamp correctly. Wrong torque sequence or skipping the angle steps causes uneven gasket crush. Also, installing the head gasket backward blocks coolant passages. And after startup, many people forget to recheck torque or change the oil after the first heat cycle, leaving metal particles from break-in circulating.
For a mainstream four-cylinder engine, a bare OEM head might run $600 to $1,200, while a loaded or complete assembly can hit $2,000 or more. Luxury or performance engines—like BMW inline-six or Ford EcoBoost—can easily double that. You also need a head gasket set, new head bolts, coolant, oil, and possibly camshaft seals. If a shop does the labor, figure 10 to 15 hours at their hourly rate. Total costs often land between $2,500 and $5,000 depending on the vehicle.
A used OEM head can be a good value if you have it inspected before purchase. Look for a unit that hasn't been overheated—check for milky residue, pitting around coolant passages, and flatness across the deck. Ask if it comes with valves and camshafts; transferring your old ones adds labor. Be wary of heads that have been welded or heavily resurfaced, as they can hide deeper problems. For a daily driver you plan to keep, I'd lean new. For a budget repair on an older vehicle, a verified used OEM head is often fine.
First, refill with fresh coolant and oil, and prime the oil system by cranking with the fuel or ignition disabled until you see oil pressure. Start it and immediately check for leaks around the head gasket, timing cover, and coolant fittings. Let it reach operating temperature while watching the temp gauge. After 50 to 100 miles, recheck the head bolt torque if the design allows, and change the oil and filter to remove break-in debris. Avoid hard acceleration or sustained high RPMs for the first 500 miles to let the gasket and seals settle.
Conclusion
A cracked OEM cylinder head isn't always a lost cause. If the damage sits away from valve seats, combustion chambers, and oil galleries, a good machine shop can often pressure-test and weld it back to service. But cheap aftermarket castings bring their own headaches—hidden porosity, uneven deck thickness, and poor core shift that only show up after a few heat cycles. Before buying, learn to read the raised casting numbers on the head itself. You don't need a dealer; factory manuals, online owner forums, and aftermarket databases can help you verify chamber volume, valve size, and year-range compatibility without anyone's permission.
Swapping a head at home is realistic but rarely as quick as a video makes it look. On a typical inline-four or V6, plan for a full weekend once you've gathered the right gaskets, labeled every connector, and borrowed a quality torque wrench and angle gauge. Torque sequence is where home builds live or die—follow the factory tightening order and incremental steps exactly, because uneven clamping warps the deck and blows the new gasket. After it runs, break-in habits prevent warpage later: avoid long idling, vary rpm during the first few hundred miles, let the engine reach operating temperature before hard throttle, and retorque if the manual calls for it. Watch coolant and oil levels closely; a small leak caught early is a lot cheaper than another head job.
Contact Us
Contact Person: Shelly
Email: [email protected]
Tel/WhatsApp: 8613967667688
Website: https://www.yongyu.com/