

Prefabricated Fence Mold Recommendations: Top Choices and Expert Tips
2026-10-05
Every contractor knows that the right LugongMachinery mold can make or break a precast fence project. But with so many options crowding the market, how do you separate the workhorses from the duds? In this guide, we cut through the noise with our top prefabricated fence mold picks and hard-won tips from the field — so your next pour comes out flawless, not frustrating.
The First Question to Ask Before Choosing a Fence Mold
Most people start by comparing prices or looking at catalog photos. But the question that actually saves you money and frustration is simpler: what kind of fence does your project actually call for? A decorative garden border, a tall privacy wall, a lightweight temporary partition, or a load-bearing retaining fence all place completely different demands on the mold. If you don't answer that first, you'll end up with a mold that's too thin for the mix you're pouring or too rigid to release cleanly.
The material choice follows from there. Concrete, plaster, resin, and even recycled composites each interact with mold surfaces in their own way. A mold made for wet-cast concrete may tear if you use a stiff, fast-setting mix. Flexible rubber molds handle undercuts beautifully but wear out faster under high production. Rigid plastic or fiberglass molds give crisp edges but demand careful demolding angles. Asking what the fence will face—weather, impact, frequent moving—tells you which mold material will last long enough to justify the cost.
Then there's the question nobody asks until it's too late: how many panels do you really need? If the answer is 'four or five to match an existing design,' a single hand-poured mold is fine. If you're planning a hundred feet of fencing, you need multiple molds, faster cure cycles, and probably a mold design that stacks or nests. Starting with the actual fence requirement instead of the mold's appearance keeps you from overbuying precision you don't need or underbuying durability that will fail halfway through the job.
Material Trade-Offs You’ll Feel on the Pouring Line
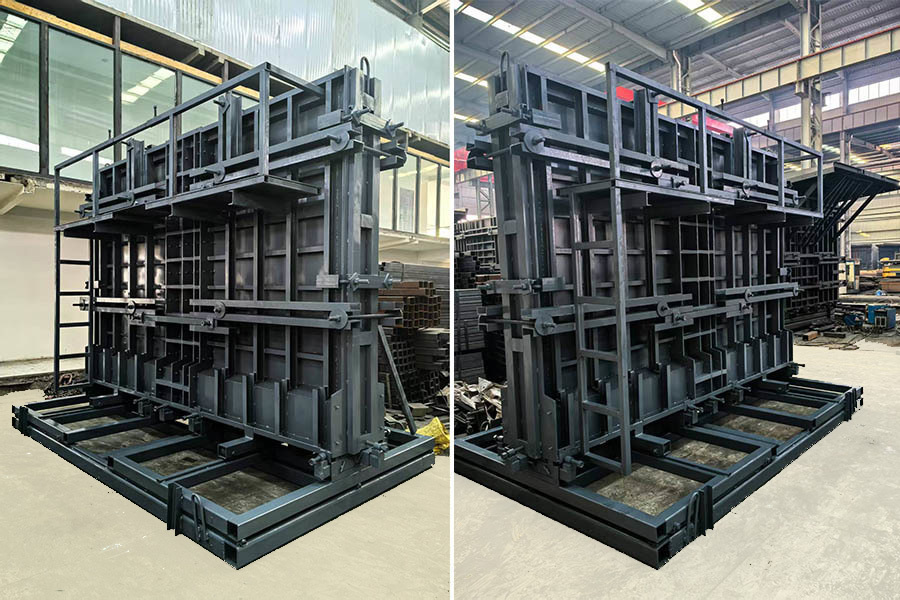
On the pouring line, the first thing you notice is how a material's viscosity dictates your whole rhythm. A cheaper resin might look great on the spec sheet, but once it hits the mold it creeps along, refusing to fill thin ribs or tight corners without a fight. You end up tapping, tilting, and pausing more than you planned, and those extra seconds per part add up faster than the invoice difference ever would.
Cure time is another trade-off that never stays on paper. Fast-set formulas get parts out the door quickly, but they often come with a shorter pot life, which means you're racing to pour before the mix starts thickening in the bucket. On a complex pour, that pressure leads to rushed moves and more scrapped molds. Slower systems give you breathing room, but they tie up your molds and bench space, so your whole schedule shifts.
Then there's the hidden variable of batch consistency. Some high-performance materials are impressive in lab tests but turn temperamental on the line—reacting to a few degrees of temperature change or a slightly different mixing speed. You'll find yourself chasing the pour, adjusting ratios and timing from one batch to the next, and wondering if a better material is worth the extra rejects. If it can't pour predictably, the performance numbers don't matter much.
Panel Depth and Rib Patterns: Small Choices, Big Impact
Most people don't notice panel depth until they feel it. A slightly recessed center panel on a cabinet door catches light differently at breakfast than at dinner, and that subtle shift changes how the whole kitchen reads. Going from a flat center panel to one with a quarter-inch step can make an otherwise plain door feel custom without shouting for attention.
Rib patterns are even easier to underestimate. Those thin vertical grooves running along a panel aren't just texture; they break up wide surfaces so fingerprints, dust, and everyday wear don't dominate the look. A tighter rib spacing tends to feel more traditional, while wider spacing leans softer and more relaxed. The difference is small on paper, but it's the kind of choice you live with every time you open a drawer.
What makes these details matter is how they interact with light and touch. A shallow panel with crisp ribbing can make a compact kitchen feel taller, while a deeper panel without ribs can ground a larger room. Neither option is wrong, but picking one without thinking can leave a space feeling slightly off. That's the real impact: not a dramatic change, but a daily one.
What Top Installers Look for in a Mold’s Edge Design
Top installers don't just glance at the edge profile; they run a fingernail along it and check how it meets adjoining surfaces. They want an edge that seats squarely without forcing, so chamfered or eased corners beat knife-sharp 90-degree angles. A tiny radius prevents stress cracks during demolding and keeps fingertips safe when handling plates.
They also pay close attention to how the edge transitions into the vertical wall. A smooth, uninterrupted path means less cleanup with a file and fewer visible witness lines on finished parts. Installers often mention that a well-designed edge lets them drop the mold into place once—no shimming, no back-and-forth—and still get consistent flash-free results.
Another detail is edge durability. Many prefer hardened edges that resist nicks from repeated clamping and everyday shop handling. If the edge is too brittle, chipping shows up quickly and creates burrs that transfer to the part. The best molds balance sharpness with toughness, so the edge holds up across hundreds of cycles without needing touch-ups.
Maintenance Steps That Keep a Mold Releasing Cleanly
A quick wipe-down after each run prevents most release problems before they start. Remove any leftover resin, rubber, or release agent with a soft cloth and a cleaner matched to your mold material. Avoid abrasive pads or harsh solvents that can micro-scratch the surface—those tiny grooves give material something to grip onto.
Pay attention to the release agent layer itself. Rather than slathering on more when parts start sticking, clean the mold thoroughly first, then apply a thin, even coat. Check for dry or tacky patches under good lighting; they signal uneven coverage. A uniform film works far better than a heavy buildup, which can transfer to your parts and clog fine details.
Don't skip a close inspection of edges, vents, and parting lines. Even minor nicks or residue accumulation along those areas can snag the part during ejection. After cleaning, apply a light rust preventive if the mold will sit idle, and store it somewhere dry with stable temperatures. These small habits keep every release clean and extend the mold's working life.
Red Flags That Signal a Mold Is Overpriced or Underbuilt
A mold that costs far more than similar tooling in the market often hides weak spots you won't spot until first shots. Look for unusually thin support pillars, undersized guide pins, or cavity steel that flexes under normal clamp pressure. These aren't just cosmetic differences; they lead to flash, short shots, and premature wear that force you back into the toolroom within weeks.
Ask the builder for the actual steel grade and heat-treatment certificate, not just a generic "P20" or "H13" label. Many overpriced molds use re-melted or mixed scrap steel with inconsistent hardness. Run a simple file test on a non-critical surface—if the file bites too easily, the core or cavity won't hold up to abrasive resins. Also check water-line placement: fewer channels or lines drilled far from the part surface mean hot spots and longer cycles, which quietly eat your profit margin.
Finally, demand a full 3D CAD review before cutting. If the supplier hesitates to show the design or cannot explain why the mold base is lighter than comparable tools, walk away. A mold that is both expensive and underbuilt often hides poor engineering behind a shiny exterior—polished plates but no real rib support, or a fancy hot-runner system paired with weak ejector pins. True value shows in the details you can measure, not the ones you can see at a glance.
FAQ
For freeze-thaw cycles or coastal salt air, polypropylene and fiberglass-reinforced plastic molds tend to outlast plain ABS. I've seen powder-coated steel molds work well too, but they need regular rust checks around weld points. If you're pouring concrete panels repeatedly, go with a mold that has reinforced edges—those corners take the most abuse during demolding.
Instead of chasing brands, look for molds with a minimum 3mm wall thickness and a slight draft angle. Contractors I know often favor modular steel molds from smaller fabricators because you can replace individual panels instead of the whole set. For DIYers, polyurethane rubber molds with a rigid backing frame give crisp details without the weight.
That depends more on your release agent and curing habits than the mold itself. A quality fiberglass mold might give you 150-300 pours if you avoid metal scrapers and let the concrete cure fully before demolding. Cheap plastic molds may start chipping at 30-50 pours. Keeping a log of each pour and inspecting for hairline cracks early helps a lot.
I'd skip diesel or motor oil—they leave blotches. Water-based reactive release agents give the cleanest finish on precast concrete. If you're on a budget, a mix of vegetable oil and mineral spirits can work, but test it on a small area first. Apply a thin, even coat with a sprayer, not a brush, to avoid pooling.
Tapping the mold sides with a rubber mallet right after pouring helps, but the real game-changer is using a vibrating table or a concrete vibrator on the mold's exterior for about 10-15 seconds per section. Also, pour in thin lifts—2 to 3 inches at a time—and pause to let air escape. For detailed textures, pre-dust the mold with a dry cement mix to draw out moisture.
Many steel and wood molds can be adjusted with removable end gates or extension plates. For plastic or fiberglass molds, cutting them is risky because you'll lose the flange strength. A better route is to build a wooden collar that sits on top of the existing mold to add height, then seal the seam with silicone caulk to prevent leakage.
Stacking them flat with heavy items on top. That warps the bottom mold over time and ruins the alignment. Store molds upright on a rack with padding between them, or hang them by their frames. Also keep them out of direct sun if they're plastic—UV breaks down the surface and makes release agents less effective.
If both sides of the fence will be visible—like a decorative boundary between two yards—spend the extra on a double-sided mold. It gives you finished texture on both faces. For privacy fences where only one side matters, a single-sided mold with a smooth back saves money and weight. Just remember double-sided molds usually need more concrete and a stronger vibration setup.
Conclusion
Before you spend a dime on any prefabricated fence mold, pin down your real production volume—how many panels will you pour in a typical week? This one question filters out half the options straight away, because a lightweight fiberglass mold that works fine for a weekend pourer will crack and warp under daily use, while a heavy welded steel mold becomes an unnecessary burden if you only make a few dozen panels a year. Material trade-offs hit you quickly on the pouring line: steel holds its shape and takes abuse but is heavy and hard to move; aluminum splits the difference with decent durability and easier handling; fiberglass is cheap and portable but demands gentler treatment. Then there are the small choices that quietly shape your final product—panel depth and rib patterns. Deeper ribs give a fence more structural punch and shadow lines, yet they use more concrete and make stripping the mold more finicky. Shallower patterns speed up demolding but can leave panels looking flat and uninspired.
Top installers always check the edge design before buying, because that detail decides whether your panels chip at the corners or lock together cleanly. Chamfered or radiused edges reduce breakage and help adjacent panels sit flush, while sharp 90-degree corners are a clear sign of a mold that will cause headaches on site. Once the mold is in your hands, maintenance is not optional: after every pour, scrape off any buildup with a non-abrasive tool, apply a thin, even coat of release agent, and inspect for hairline cracks or rough spots that will only get worse. Watch out for red flags on price and build quality—if a mold seems suspiciously cheap, it probably uses thin-gauge steel or weak corner welds that will flex out of alignment. On the flip side, an expensive mold loaded with adjustable features you'll never use is just as bad a deal. The sweet spot is a mold that matches your pace, releases cleanly, and holds its dimensions pour after pour.
Contact Us
Contact Person: Zhang Zhenlai
Email: [email protected]
Tel/WhatsApp: 8618563210000
Website: https://en.lugongmachinery.com/